1. Sign into Okta from the Okta website https://seo.okta.com
2. Click the Printer Logic tile

3. Click Install

4. Click Install Extension

5. Click Add to Chrome

6. Click Add extension

7. Refresh your screen and click Install again to install the printer logic client

8. Click on the Installer on the bottom left to run the installer

9. Click Yes

10. Click Next

11. Click Install

12. Click Finish

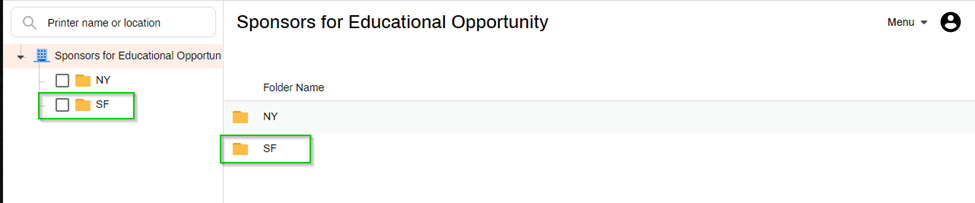
13. On the Printer Logic dashboard, Click SF
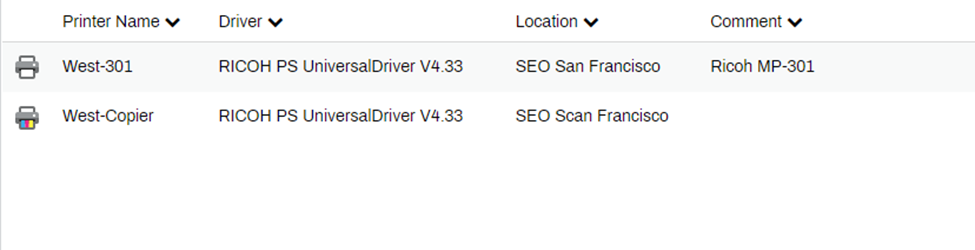
14. Click on desired printer to install from the list below:
15. Click Yes to install.
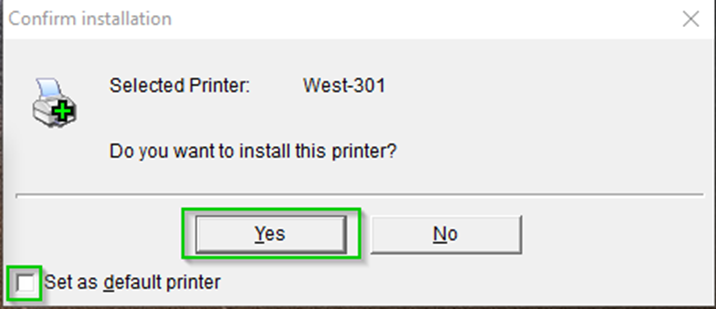
Note: Check the box "Set as Default Printer" if you like this printer to be your main printer.
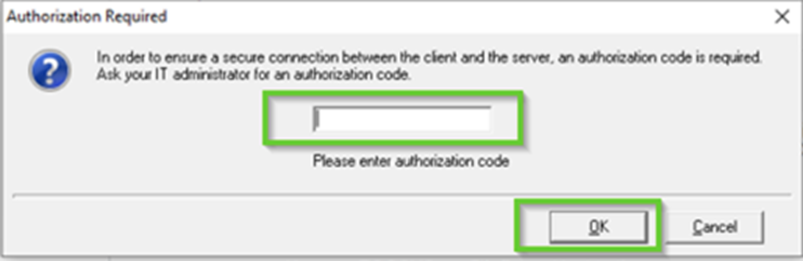
16. Please enter Authorization Code 4219gs4x and click OK.
17. After Authentication code is accepted, reselect desired printer to install

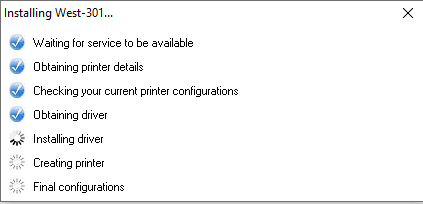
18. It will take a few seconds to install as shown below:
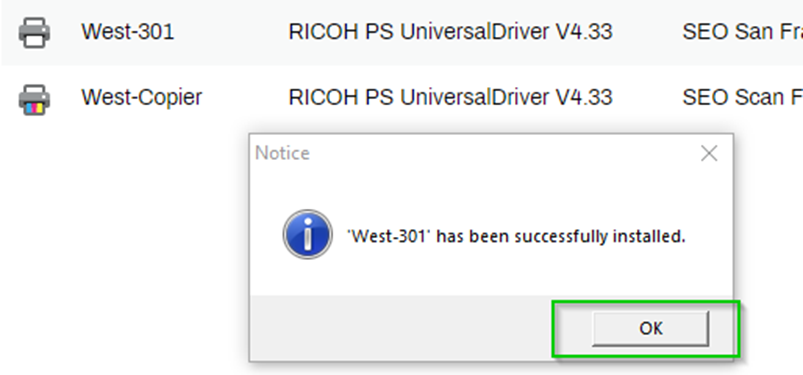
19. Printer has been successfully installed message will appear.
Note: Repeat step 17 to install additional printers.